Today I found a fantastic article that really sums up my thoughts about technology in education. Read the article here: https://www.iste.org/explore/articleDetail?articleid=229&category=ISTE-Connects-blog&article=&utm_source=Facebook&utm_medium=Social&utm_campaign=ProjectReimaginED. "There’s a wide gulf between technology use in the classroom and actual tech integration."
Yes! How do we (teachers) use technology to transform learning for our students instead of using technology to substitute tasks that we currently have students complete? There is certainly a place for technology as a substitute- practicing math facts, sight words, number recognition, etc. But true integration goes beyond that and allows students to use technologies to enhance and transform their learning. And when student learning is transformed, teaching has been too!!
Alright...summer's here! Time for me to catch up on all the fun things I've made this year! Here's the first post (of hopefully many) detailing the excitement of my son's 8th birthday party theme: MINECRAFT! As I learned from our local party store, Mojang (Minecraft's creator) does not sell a Minecraft license that enables companies to make and sell commercial birthday supplies. So...most things I found while scouring various websites were handmade, and subsequently, mine were too (which I quite enjoy). See below for ideas for a Minecraft Birthday Party!
Invitations and Thank You Notes
I designed the invitations and thank you notes just for Collin. I used my Silhouette Cameo to cut envelopes with a Creeper face to contain the invitations. So fun!
Finished invitations and envelopes!
Thank you cards for family...
Thank you cards for friends!
Treats for School
My son requested Krispy Kreme donuts for school treats. Because I wanted to stick with our theme, I called and asked Krispy Kreme if they had any green glaze that they could use instead of the regular. THEY DID! They were more than happy to make glazed green donuts and MORE than happy to supply Krispy Kreme balloons and hats when I picked them up from the store. I'll definitely be returning if I need another 'custom' donut!
Another idea to make Minecraft donuts is to have filled donuts glazed in green (above). This creates the perfect canvas for a creeper face.
Melt chocolate candy melts, put in a frosting bag, and pipe over a creeper face template (you can see one here). Let the chocolate harden and carefully place one on top of each donut. How fun!
Balloons
I searched and searched the internet for balloons to use for his party. I wasn't happy with anything that I saw...so I decided to get some basic round balloons in Minecraft colors: red and purple latex and green and black mylar and a huge #8 balloon.
On the black mylar, I added Enderman eyes- 1"x4" strips with a 1"x1.5" purple rectangle for the center.
On the green mylar balloon I cut a creeper face with my Silhouette and attached with double sided tape.
***Note: when adding paper to mylar balloons, use regular printer paper. Cardstock is too heavy and will weigh the balloons down (as I found out and had to re-cut with regular paper and hope the balloons didn't pop as I moved the tape around!)
Cake
The cake was by far the hardest for me as I wanted something unique, yet doable. There are many wonderful ideas if you search "Minecraft cakes" on Pinterest or Google.
I chose to create my own cake and used Minecraft action figures to decorate the tops. I made 2 cakes- one 9" square and one 9"x5" loaf pan. I let them cool and cut the 9"x5" cake into thirds. which I added to the square cake. You can see the final design (before fondant) above. I used green and blue fondant, found at Joann's or Michael's craft stores, to cover the cake and finished the edges with frosting. I added the action figures to the tops and made them blend in with the cake by using Wilton tip #233 with green frosting. My son was amazed to see the finished masterpiece!
Finished masterpiece!
Enderman and Diamond Steve action figures were found at Target, but they can been found at most toy stores or amazon.com.
The creeper was one of the hangers I purchased for the party favors (below)- I just removed the top piece. I did the same for the animals on the cake too.
I added diamonds to Steve's treasure chest by using blue sixlets, found at Target!
Party Favors
I made party favors from large glow-in-the-dark cups that I ordered from Oriental Trading. We held the party in a room with a blacklight, so these were perfect! I created the Creeper face on my Silhouette software, cut it out of black vinyl, and attached them to the cups.
I filled the up cups mostly with shredded paper and then added the fun items like (keep reading for links for where to purchase):
-Sticks of TNT
-Minecraft hangars
-Mining pencil
-Glow stick
I used candy pretzel bags, red licorice, white paper, and a TNT sticker (made and cut on my Silhouette) for the TNT sticks.
I also found pickaxe pencils on orientaltrading.com that were perfect for the Minecraft theme. They sell for $6.99/dozen at orientaltrading.com.
I also put Minecraft hangers in each party favor. These are keychains with a variety of Minecraft characters attached. There is a good variety on amazon.com.
The last item in the favor was a glow stick- from the $1 bin at Target.
The party was a huge hit! Everything came together wonderfully and Collin had a great time! I loved, loved, loved seeing how happy he was!!!
Yep...already behind my goal of posting one thing everyday. Well, I'm not going to let that stop me. :)
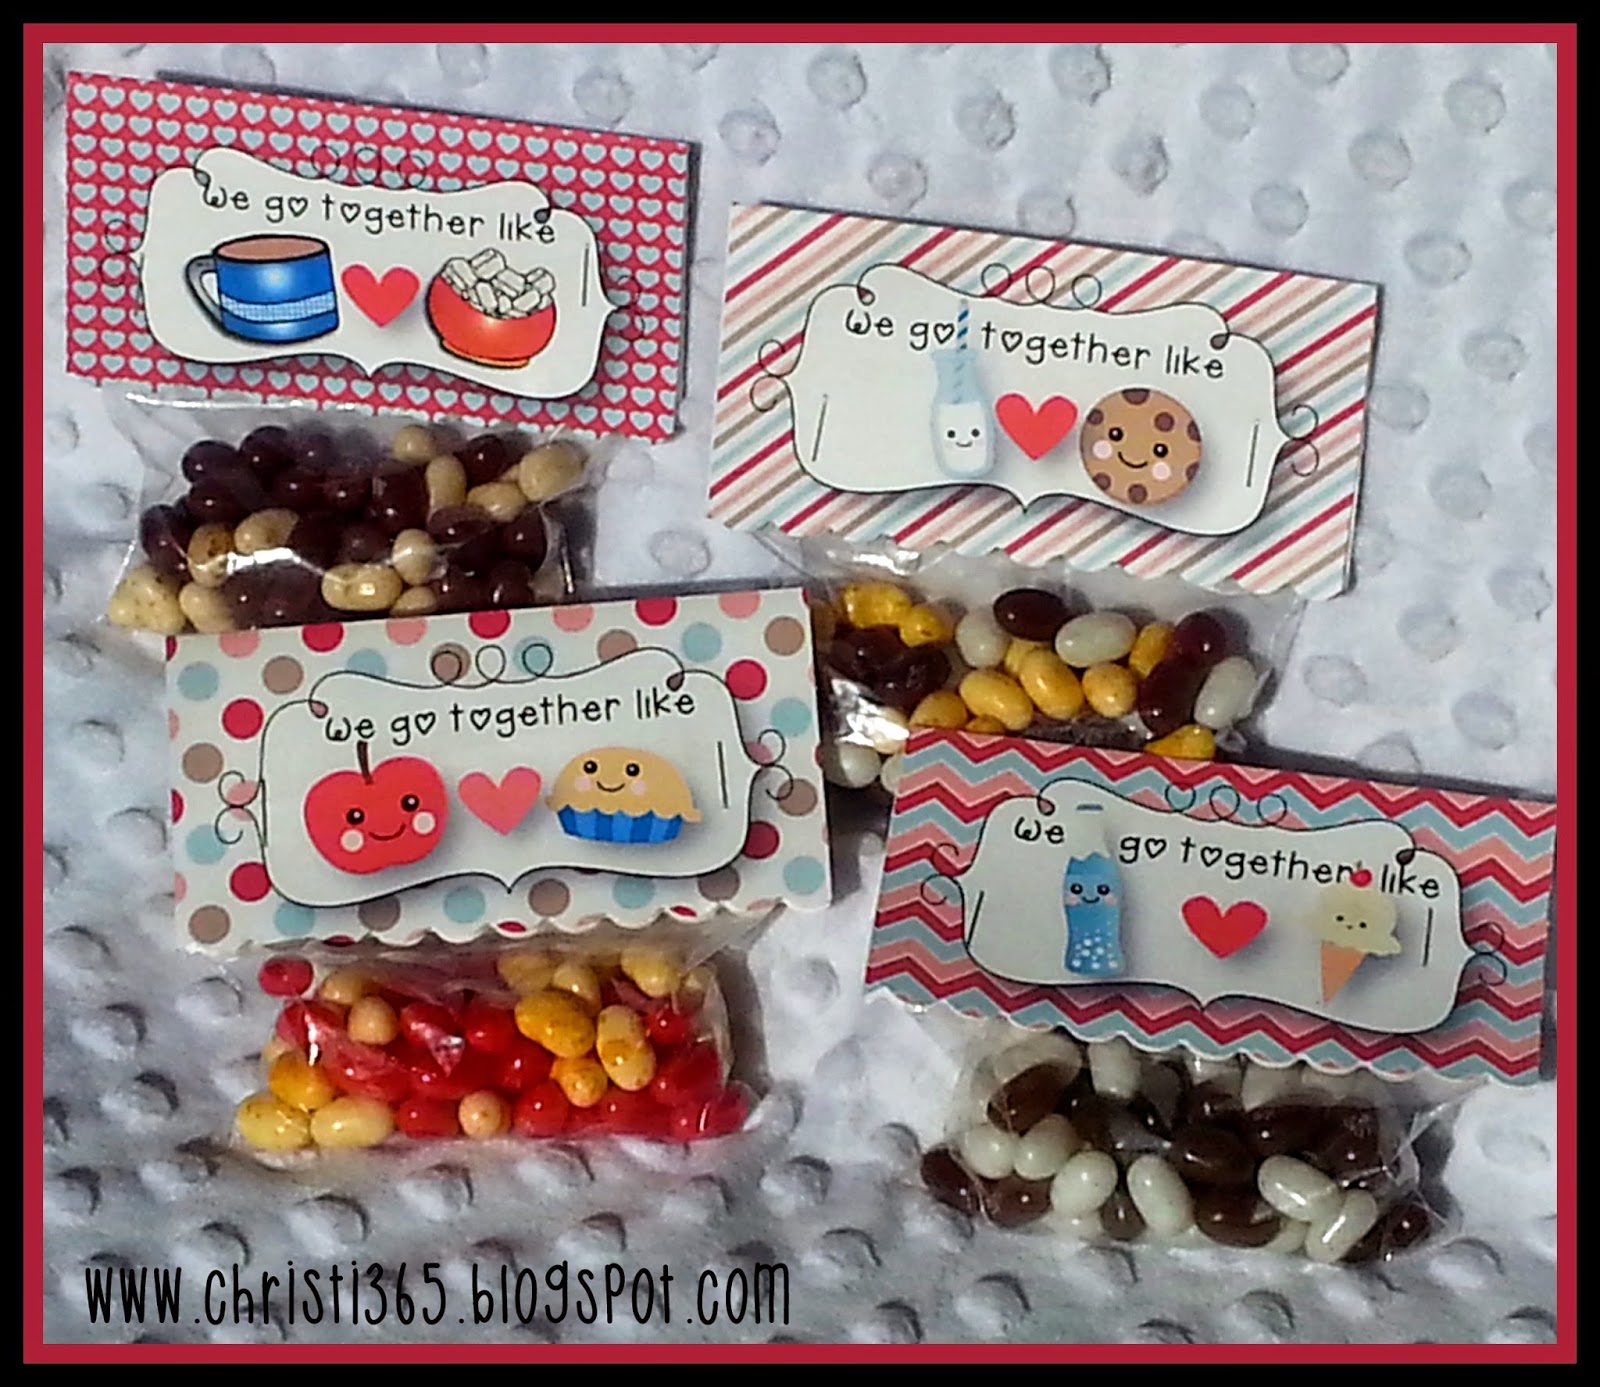
I am making some super cute Valentines for my kids this year and thought you might like them too! I have had these adorable food graphics since last year, had an idea, but it never went anywhere. So this year I was determined to create something cute and "We Go Together" valentines are the result. The combinations are:
Hot Chocolate & Marshmallows
Apple and Pie
Milk and Cookies
Root Beer and Ice Cream
As you can see, I used jelly beans for the candy. There are probably a bunch of other flavor combinations...but I just stuck with these four. Recipes below.
I formatted the tags to fit nicely with a 4" x 6" bag (found at any craft store). After printing them, I folded each tag in half and used a scallop border punch along the bottom.
These are the Jelly Belly beans used for each combination:
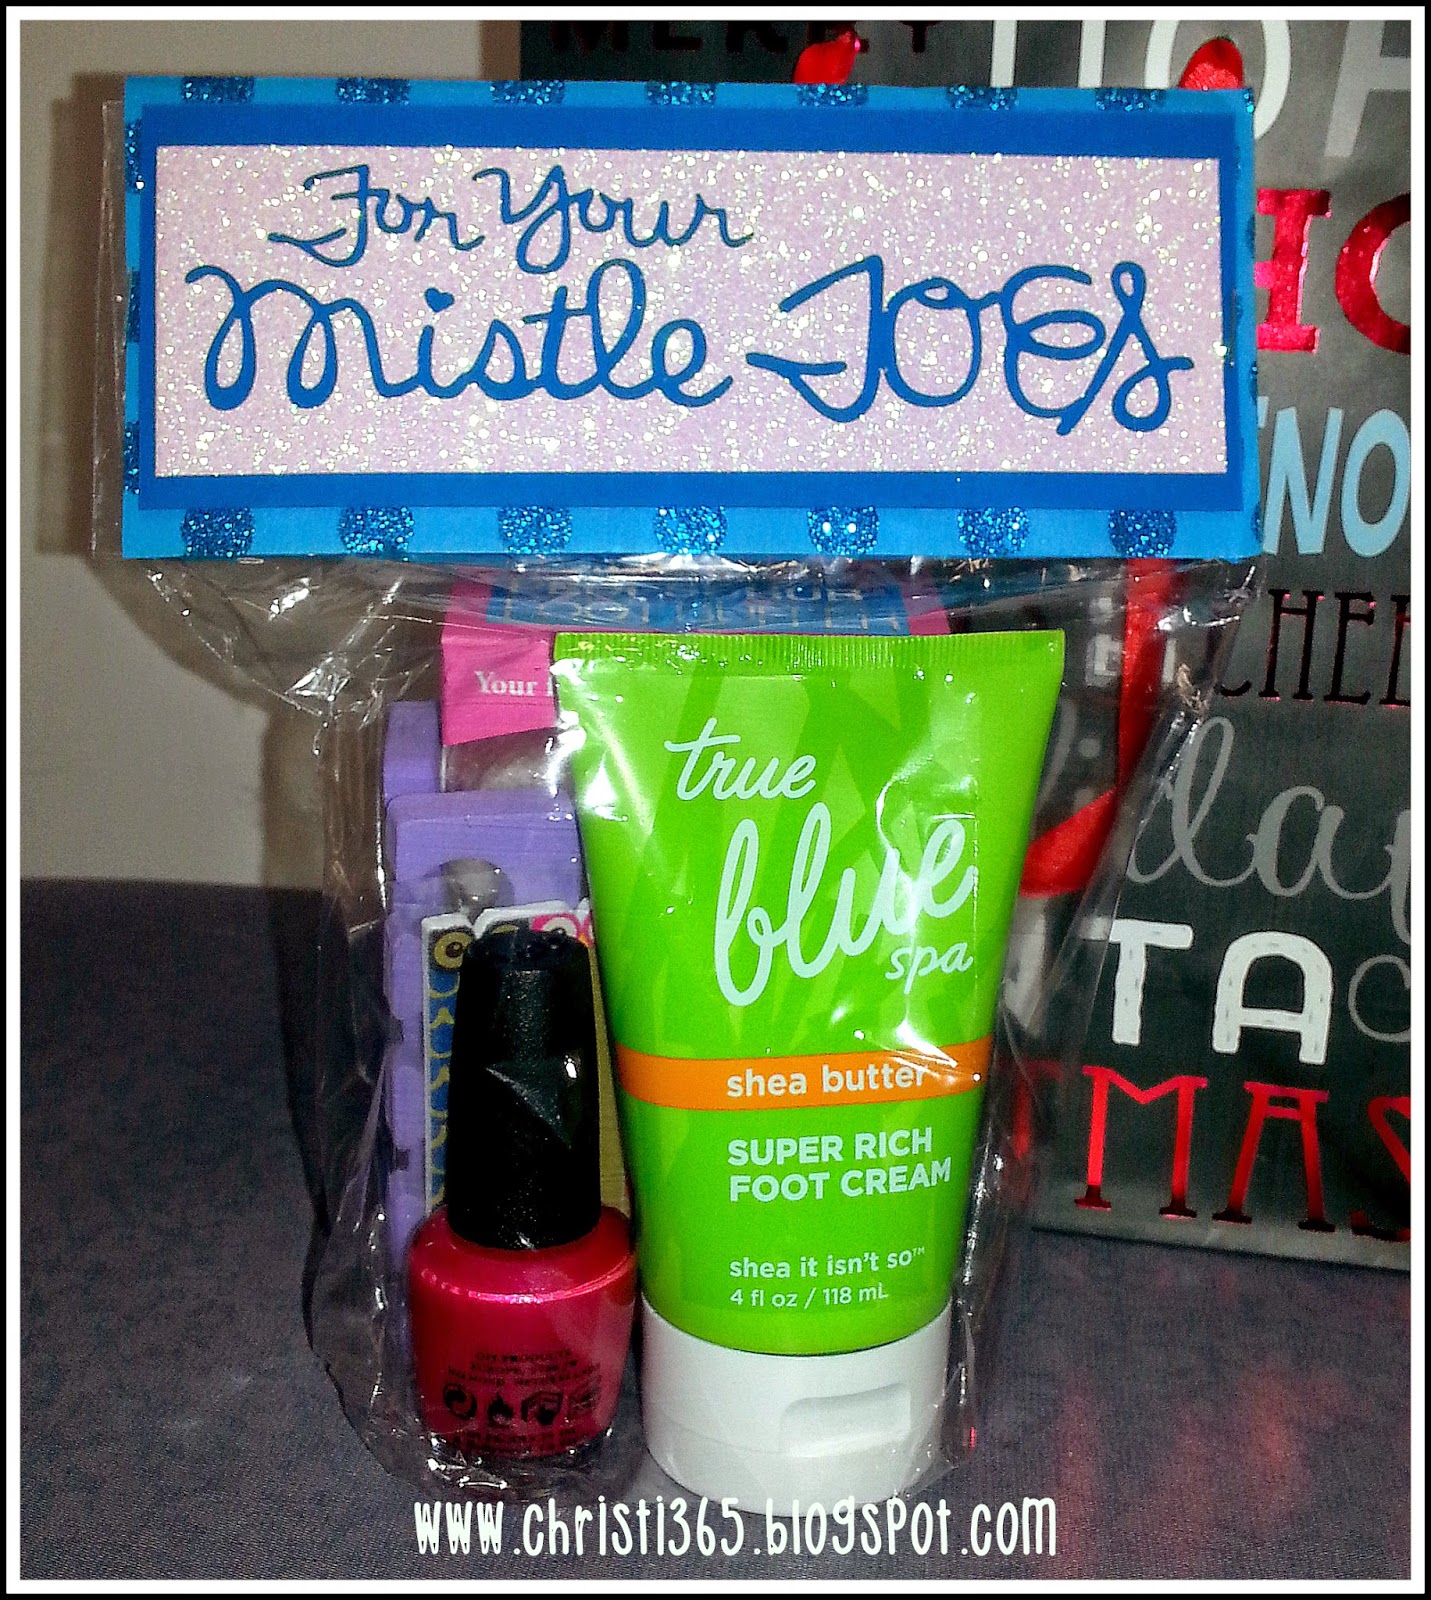
During a road trip, I was browsing pinterest and saw a super cute idea post (here) and immediately decided that was something I wanted to recreate for some Christmas gifts. I just loved the saying and loved the idea of making a mini-pedicure in a bag. Plus, it looked so easy and fun!
I used my Silhouette cutter with white glitter paper to create the tag and two other papers for the background. The dimensions of each paper is approximately:
Top layer (white glitter): 2" high x 6.25" wide (I cut the rectangle after the words had been cut)
2nd layer (solid blue): 2.5" high x 6.5" wide
Bottom layer (glitter polka dot): 6" high x 7" wide. This piece folds in half and sandwiches the bag opening.
In each bag (small clear gift basket bags, Michael's) I put:
True Blue Foot Cream (Bath & Body Works)
Opi Nail Polish (color chosen specifically for each gal)
Nail Files (I found some really cute ones at Bath & Body Works before Christmas)
This gift was fun to make, fun to give, and would be super fun to receive! I'm planning on using this idea again, but with different sayings. Here are a few ideas:
Mother's Day:
"Hands down, You're the best!"
"Thanks for always holding my hand!"
Teacher Appreciation: "Thank you for helping to 'polish' our student's skills!"
Birthday/Just Because: "Never let anyone dull your sparkle!" (include glitter polish too)
I think it is really important to say 'Thank You" when given a gift..but this is especially true during the holidays. My kids don't always get to see everyone, so sending a thank you note is a nice way to let that person know how much they liked the gift.
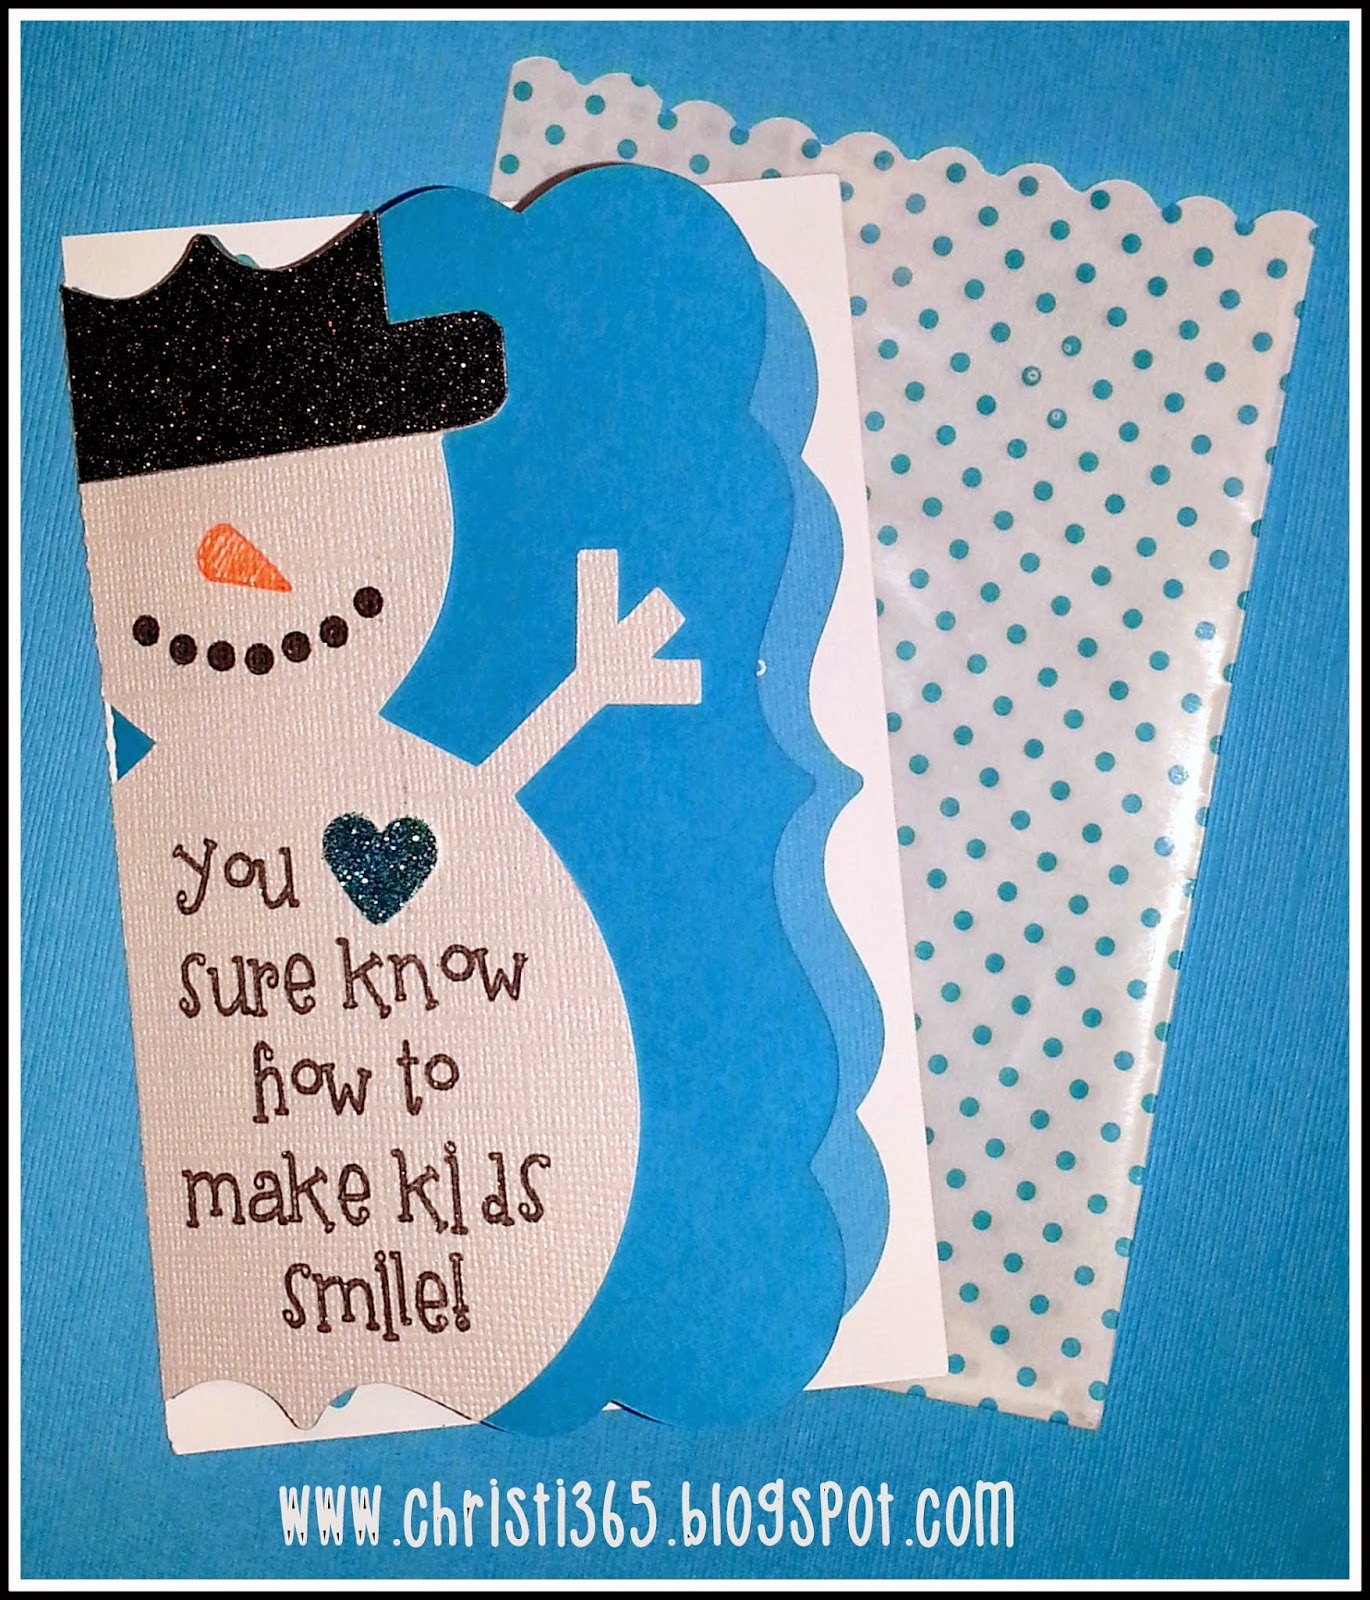
Today I made thank you cards for my kids to send for the gifts they received last week. I used my Silhouette cutter and software to design a fun card with a cute saying that I had seen previously on a Hallmark card. You can see the final product below.
I had SO MUCH FUN designing and choosing papers for this card! I also found some small bags from Michael's to put the cards in before sending them in envelopes.
I can't wait for people to start receiving them! We'll be finishing and signing them tomorrow before shipping them off!
Here's a link to version for you- if you'd like to make a similar style card. It's a blackline version of the card to print on cardstock, cut, fold, and embellish! These cards fit nicely in 4 3/4 x 6 1/2 envelopes (called Photo envelopes at Staples).
Here are also two other Thank You cards that I've created and used in the past. All graphics are DJ Inkers.
I typed personal Thank Yous to my students when I was teaching. Below is an editable template (MSWord) for you to use, if you wish. There are 2 cards per page. All you have to do is type the message, print, and send/give! They fit perfectly in greeting card envelopes size 5 3/4 x 8 3/4.
I created this card when my son was 4- he was IN LOVE (and still is) with dinosaurs. I combined several DJInkers clip art images in Adobe Photoshop to create a fun way for him to say Thank You to the multiple gifts (many dinosaurs) he was given that year. Again, I typed personal Thank Yous and had him sign them.
Below is an editable template (MSWord) for you to use, if you wish. There are 2 cards per page. All you have to do is type the message, print, and send/give! Again, they fit nicely in greeting card envelopes size 5 3/4 x 8 3/4.
One of my goals this year is to share some of the items I've created. Here's a quote that I will be posting in my office when I return to school. It's a great reminder on those days when you're just not sure of the path you should take.
You can download the pdf (with smaller watermark)here.
It's been a long, long time since I last wrote anything. Partially because we moved from Iowa to California in the summer of 2013 and partially because I know there are TONS of blogs out there. I don't want to get lost in the vast sea of blogs available today, and I sometimes wonder what on earth I have to offer that isn't already out there, so I have been hesitant to keep up with this.
Well, today I will make a stronger attempt to post some of my creative ideas/projects. I don't have a 'focus' medium, but I like to do it all: scrapbooking (really any paper crafting), sewing, painting, refurbishing items, and of course, digital work. I'm probably missing something, but if I have an idea about a project, I'll figure it out! Anything that boosts my creativity is open for me to try.
So here's what I was busy crafting today- New Years photo props for my 2 kids. We'll be celebrating at home tomorrow night, but that doesn't mean we're not going to have fun.
I was inspired by props posted in a post on www.classyclutter.net. (The direct link wasn't working at the time of this post). They are cute and fun and perfect for a 7 year old and 2 year old. I used my Silhouette Cameo cutting machine (the best thing ever!!!) to cut glasses, a hat, crown, and the lips. All of the shapes are in the Silhouette online store. However, I did transform the glasses to include 2015 in the lenses and added the year on the hat and crown.
For my Mr. For the little Miss
I still have to add the lollipop sticks to the glasses, mustache, and mouth. I'll probably use elastic for the crown since my very strong-willed daughter will insist on wearing it all night. The hat will probably get a lollipop stick too.
Materials used:
Silhouette cutting machine
2 12x12 pieces gold glitter cardstock
2 12x12 pieces black glitter cardstock
Lollipop sticks for handles
If you have a Silhouette cutter, here is a great video showing how to weld 2 objects together. I used this feature to weld the numbers in my glasses so that they wouldn't be cut out in separate shapes- but rather 1 continuous shape.
I can't wait to see our kids with the props! (Maybe I'll get a few pictures of us too...)
Happy New Year!